Setting Up at a Show

Thursday, September 13, 2012

Do you know Salsa? No not the dance, the other kind of Salsa.

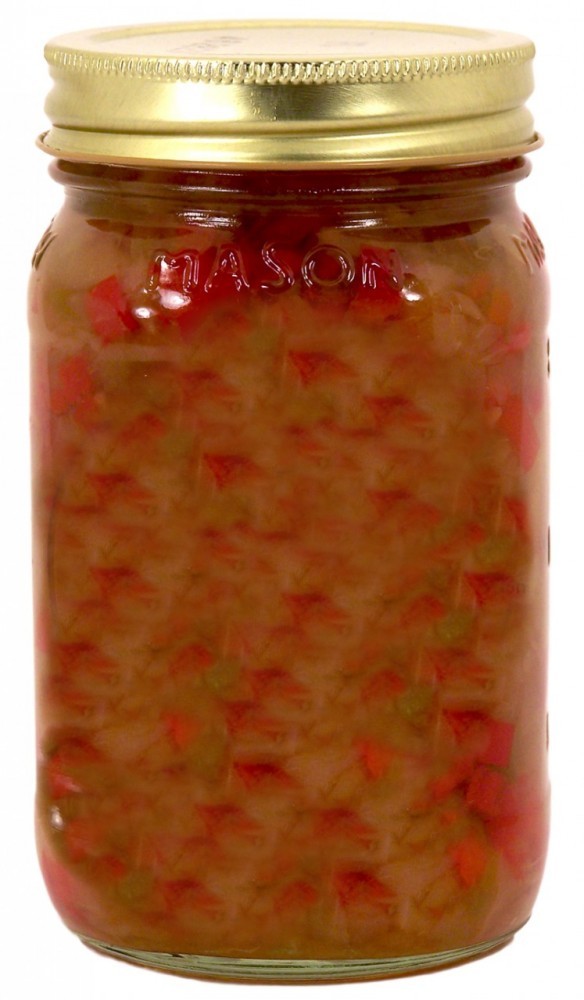
Not this kind of Salsa!!

From the e-mails I received, Salsa is going on big time. I love Salsa, especially the ones with other ingredients than tomatoes.
What, you didn’t think it could be salsa without tomatoes?
Also I say that this blog is about cooking like Grandma did. Well this blog is one that I don’t think my Grandma ever thought about. Just one more comment and we can get cooking.
I don’t know how to Salsa  dance, I just cook.

Have I got your attention?

 Let’s start with a couple of more traditional and work our way to the unusual. Here is a great named Salsa that tastes great.

Quickie Salsa

This is a recipe for a Salsa that can be made for a time when you want a salsa, and you haven’t canned any yet. This uses canned ingredients, but if you have fresh use fresh. Fresh always tastes better than canned.

Burger & Dog Salsa     

1 can Diced Tomatoes or 2 large Tomatoes (or 3 medium) chopped fine. 1 clove Garlic, crushed. ¼ cup Onion chopped (any kind will do, but Vidalia or Red Onions really make a better flavor). 2 tbsp. chopped canned Jalapeno Pepper, or 2 fresh peppers that have the seeds remove as well as the white membrane. ½ tsp. Cumin and ¼ tsp. Dried Pepper Flakes. 1 tsp. dried Cilantro.


 In a large bowl combine all ingredients and mix completely. Let sit in a cool place for at least 30 minutes for best taste. You can use it immediately if you need it now. For those of you that don’t like any heat, you can substitute Poblano or Serrano peppers. If you want more heat, add a Habanero pepper that will take the heat level thru the roof.

How about another that is easy to prepare and tastes good.
 

                                                   Burger & Dog Salsa

4 cups Tomatoes, diced. 1 can diced Green Chilies (7 oz.). 2 cloves Garlic, crushed. 1/2 cup Cider Vinegar. 1/8 tsp. ground Cloves. 1 tablespoon Cumin. 1 tablespoon fresh Cilantro, chopped.


Combine all ingredients in a cooking pot. Simmer for 15 minutes. Let cool before serving. Can be kept in the refrigerator and served another time. Great on hamburgers or hot dogs. Try this in place of mustard and ketchup. You are in for a surprise. Not bad on Brats, but I am a Brat purist, only spicy mustard on my Brats. One more note, this is best on grilled burgers and dogs. That taste you get from grilling can not be had by anything in the kitchen.

Now let’s change things a little. Time for one that you probably never heard of.

                                                     Watermelon Salsa   

1 ½ cup Watermelon, diced and seeded.   1 cup Jicama, peeled and diced (What is a Jicama? It is a large, edible, tuberous root of a tropical American plant, eaten as a vegetable either raw or boiled). Taste is similar to a radish or apple; rhubarb may be used in place of Jicama. 1 cup Orange, peeled and diced. 1 Jalapeno, chopped and seeded with the white membrane removed. 3 Tbsp. fresh Cilantro, chopped. 1 Tbsp. Lime Juice.

 Mix all ingredients, place in refrigerator for at least 1 hour. Served Chilled. If you are going to make enough to can, multiply ingredients by 4. Heat to a boil and place in 8 ounce canning jars. Process in a boiling water bath for 10 minutes with at least 2 inches of water covering the jars.  The Jicama really thru me for a curve. I had to look it up to find out what it was.I was glad when it gave me other things to use if I could not find Jicama in my local farmers market or grocery store.
Canned Watermelon Salsa will have a different taste compared to fresh. Pick whichever one you like. I like the uncooked better. But try them both, pick for yourself and family.
I told you it was going to be different. The next one is also a little different.


                      Lime Salsa/ or Lemon Salsa

8 large Tomatoes, diced. 8 Tomatillos, diced (fresh or canned). 1 cup Red Onion, diced. 1 cup Bell Pepper, any color, diced.                      1 tablespoon Cilantro. 8 tablespoons FRESH Lime Juice (or frozen not from a bottle). 8 teaspoons Lime Peel, grated.

Dice tomatoes, remove husk from tomatillos and dice. Mix together and add other ingredients. Cover mixture and refrigerate overnight (at least several hours). This will allow flavors to blend. If you wish to can this, then heat to a boil and put in prepared canning jars (8 ounce preferred). Process for 10 minutes in a boiling water bath with at least 2 inches of water over the jar tops.
For Lemon Salsa, just replace lime with lemon. Everything is the same except the taste. We did find a lime juice from Key West that was made from Key Limes. This bottle juice tasted great. Look at your local store for Key Lime Juice.
 

The next Salsa has a Mediterranean flavor. If you like olives on your pizza, you will love the taste.

                                              Black Olive Salsa                                                    

 4 large Tomatoes, chopped. 2 cups Black Olives, sliced or chopped (you decide). ¼ cup Onion, diced. ½ cup fresh Cilantro, chopped. 1 tbsp. Vinegar. ½ tsp. dried Basil

Combine all ingredients, mix and chill several hours. Mix again before serving. Great for Tacos or Taco Salads. Serve as a topping for grilled fish or chicken.

The next one is something we use plenty of. We love to grill Taqitos and served with Sour Cream and Salsa Verde. I wish you would try this combo. It is so very good.


Salsa Verde                                  

1 can Tomatillos, drained and chopped, use a 15 ounce size. 2 Jalapenos, seeded and chopped. 1/3 cup onion. 1 teaspoon Cilantro, fresh or dried. 1 Tablespoon Vegetable Oil.

Place Tomatillos, Jalapenos, onion and Cilantro in blender. Blend till you get a smooth mixture. Put into cooking pot add all other ingredients. Sauté till mixture is smooth. Store unused portion in refrigerator.

Here is another salsa that does not have to be canned, enjoy it fresh for best taste. I know this blog is about home canning. You got to give me a break, some things taste better uncooked, and uncanned (if that is a word). So pretend that you are reading a magazine and saw this recipe. You ripped it out and took it home. Don’t we all do that in the Doctor’s office?

                                                                         Fresh Garden Salsa
2 large tomatoes, diced. ¼ cup onion, diced. ½ cup cucumber, diced. ½ cup zucchini, diced. ½ cup yellow squash, diced. 1 Jalapeno pepper, chopped and seeded with the white membrane removed. 1 tbsp. Lime or lemon Juice (fresh is best). ½ cup fresh Cilantro, finely diced.

Combine and serve proudly. If you don’t like squash or zucchini try a ripe Avocado. The lemon or lime juice will keep it from turning brown. Not a salsa that should be canned. Fresh salsa is the item of choice in certain occasions. But just think, here is another way to use those zucchini that your neighbors brought you.
It is that time again. Just as I get rolling. Well there is plenty of room in future blogs.  The next will probably be more along the Grandma line, but you are going to have to check back and find out just what is under the big white hat.

Don’t forget…. let me know what you would like to make or any ideas you have for the next blog. Just drop me a note at jellymanga@gmail.com

Don’t keep my blogs a secret, pass the word on to your friends, neighbors and family members. They just might make something and share with you. 

Please feel free to share my blog on Facebook or Twitter or even MySpace.com.
  
Don’t forget, if someone asks you can you can it? 

Say YES I can can it.

Rate this:


1 Vote

Sunday, September 2, 2012

Can U Can It: Preserving the Past with Preserves

Can U Can It: Preserving the Past with Preserves: When you here someone talking about Preserves, what is the first thing that comes to mind?  For many  Preserves mean Strawberry . Others...

Preserving the Past with Preserves

When you here someone talking about Preserves, what is the first thing that comes to mind?  For many Preserves mean Strawberry. Others think of Peaches. Still others think of something else, depending on where you grow up and the type of fruit available in your area. When I hear preserves I think of Fig Preserves.

My father's mother made the absolute best Fig Preserves in the world. That sounds like a big boast, but you need to remember that this was the lady that started my on the road to where I am today sitting here typing for you to read. The very first thing I made was Fig Preserves. Now I am going to tell you how she made them, the same way Mary Lynn and I made them, please feel free to substitute any fruit any place it says fig. I know there are people that do not like figs. Strawberry, or Raspberries or any thing you like works almost the same way. Here is a photo of what old fashioned Fig Preserves look like.

If you are going to make Fig Preserves you have to look at the type of figs available. Some Figs are large, and some are small. If you pick the large ones you may have to cut them in half. The smaller types are best whole. In the photo we made this with whole figs. If you have to cut your figs, they will still look nice, but totally different than ours. They both are the same, the only difference is the fig. As a manor of fact some say that sliced make a more attractive preserves. Compare the two types of Fig Preserves. In the first photo whole figs are used. The second photo to the left shows sliced figs. They are both Fig Preserves but they taste a little different and the look completely different. So it is your choice on the type of Preserves you make.

Before you can make Preserves of any type you need to know what real Preserves are. They don't resemble the things you get in most restaurants and fast food places.

According to Wikipedia: Fruit preserves are preparations of fruits, vegetables and sugar, often canned or sealed for long-term storage. The preparation of fruit preserves today often involves adding commercial or natural pectin as a gelling agent, although sugar or honey may be used, as well. Before World War II, fruit preserve recipes did not include pectin, and many artisan jams today are made without pectin. The ingredients used and how they are prepared determine the type of preserves; jams, jellies and marmalades are all examples of different styles of fruit preserves that vary based upon the ingredients used. Many varieties of fruit preserves are made globally, including sweet fruit preserves, such as strawberry, as well as savory preserves of culinary vegetables, such as tomatoes or squash. In North America, the plural form "preserves" is used to describe all types of jams and jellies. In British and Commonwealth English most fruit preserves are simply called jam, with the singular preserve being applied to high fruit content jam, often for marketing purposes. Additionally, the name of the type of fruit preserves will also vary depending on the regional variant of English being used.

Sounds like many different ways of describing something. When we make preserves we use the definition described by one of the oldest cook books. It states that Preserves are whole or large pieces of a fruit that has been cooked down til the juice has made a thick syrup. With our preserves you could tell the fruit just by looking at the jar.

The first thing you need to do is decide if you are going to have to cut your fruit. In the case of strawberries you will probably need to cut them. Next is wash the whole fruit and make sure you have no  bad spots or fungus. Next put the fruit in a bowl that you can put in your refrigerator. With the fruit in the bowl cover completely with sugar. Gently move the fruit so that all pieces are exposed to the sugar.  If the fruit soaks the sugar, add more to cover the fruit. If you use some of the more juicy fruits you probably will only need to sugar one time. If you use some of the more juicy fruits you probably will only need to sugar one time.   Now place a cover over the bowl and put in your refridgerator. The next day carefully drain the juice the has accumulated in the bowl and save it. Add more sugar to cover again and put bowl back in fridge. Several hours later check to see if all the sugar has dissolved. If it has drain and repeat the process. Keep doing this till the fruit has absorbed as much sugar possible. Now take all the juice that you have collected and put in a large enough pot to hold the fruit.
Now cook your juice slowly til it reduces to half volume. Add a few slices of lemon. This will help make the fruit strong and not fall apart. Carefully add your fruit and cook gently till your fruit is soft without falling to pieces. Cook this juice till it starts to thicken, the fruit will look a little translucent. With a slotted spoon or wooden spoon carefully remove the fruit from the mix. With the fruit removed, cook the syrup til it reduces to a thick syrup. 
Now carefully put your fruit in clean canning jars that have been rinsed and sterilized. Do not fill to the top, save run for the syrup. Now using a ladle and a jar funnel (if you have one) fill the jars to within 1/4 inch of the top. At this point you have to make sure there are no air bubbles trapped. It is a very important step. Air bubbles take room that is needed for the juice. Next take a wet paper towel and clean the jar tops. This is needed to insure a good seal between the domes and the jars.Now place the jar domes on the jars. Make sure your domes are clean. Then place the rings on the domes. Finger tighten the rings. Do not over tighten, this will make it difficult for air to escape. Too loose and water will leak in and ruin your work. 

At this stage of cooking, if you have any juice left over, save it and in a upcoming blog I will tell you how to turn the left over juice into a delicious syrup.

Process your jars in a boiling water bath that has enough water to cover the jar tops at least 2 inches. This important for a good seal. Boil the jars 15 minutes, then remove from the water bath and place on a cooling rack or counter top. The right equipment makes boiling your jars easier than trying to rig something up.


After you have removed the jars from the boiling water and placed on a drying rack you will hear the jar domes pop as they cool. This is a great sound when you are canning. This means that your jars are sealed. After your jars have sat over-nite check to see if any have not sealed. If you have some, don't worry you did everything right. Some jars just won't seal, so you have to remove the domes, clean the rim again and place new domes on and reprocess. After the jars cool, they are ready for your labels or whatever you want to put on the jars. I do suggest putting on  a label of some kind as you want to know what you are grabbing out of your pantry. If you have several types of preserves, some can look similar. Also labels are nice when you give your jars as gifts.

When you are making preserves you don't always get the best results trying to keep the fruit in whole or large pieces. Whenever we make fig preserves about 1/4 of then become fig jam.  The big pieces or whole figs just fall apart, so just add pectin and make jam. Don't feel bad when this happens, even canning pros' have this happen. It still taste great, so just try again with fresh fruit.

Another thought when you are doing preserves is making more than one fruit in a batch. Combinations of fruit make some "killer" preserves.

Combinations that we have made are: Strawberry/Fig, Blueberry/Blackberry, Blueberry/Peach, Peach/Mango. As you can see, the combinations are limitless. Try combining two of your favorites and see how they come out. Don't worry how the contents of the jars look, you are going for taste. 

We first made Blueberry/Blackberry from a accident we had. We put our fruit in the freezer in measured amounts in each bag. If it was 8 ounces or any other amount, we wrote that at the top of the bag. Doing this makes it much easier to work with more than one fruit. By writing at the top you can still read the amount and contents easier. The accident we had was when we took a bag of blueberries and a bag of blackberries out of the freezer. I placed them in a bowl and put it into our refridgerator to thaw. The next day they had thawed, but when I went to take out the bags, they had leaked due to a hole. So we had a large bowl of Blueberries and Blackberries mixed together.We never threw anything out that might work, so we tried the combination. We called it Black & Blue Preserves.
Black & Blue Preserves


It sold great and when it was all gone, we had many customers asking us to make it again. So a star was born by accident.

Combinations make labels important. Look at the Black & Blue, can you tell the difference looking at it. Is it Blueberry? Blackberry? or both?
Look at this jar. Is it Strawberry, or Strawberry/Fig? It is Strawberry/Fig. So you can see while it is hard based on just looks.

Figs that broke apart while cooking turned into a Blue Ribbon Fig Jam at the Georgia National Fair. In a latter blog I will give you some awesome recipes for things made with preserves. They make a lot more than you might think.

So it is getting to be that time again, just as I was getting going. Oh Well! Can't fight the blog wars with a blog to long. So I want you to try to make something with the ideas listed above. As you can see the possibilities are limitless. So get out there and find you some beautiful fruit that is saying "Yes make us into Preserves".

Don't forget.... let me know what you would like to make or any ideas you have for the next blog. Just drop me a note at  jellymanga@gmail.com

Don’t keep my blogs a secret, and pass the word on to your friends, neighbors and family members. They just might make something and share with you. 
Please share my blog on FaceBook or Twitter or even MySpace.com. The people that see your share might even make something and give you some. So don't be shy, pass me along.
 
Don’t forget, if someone asks you can you can it.Say Yes! I can can it.

Friday, July 20, 2012

Can U Can It: Revisiting Apple Butter

Can U Can It: Revisiting Apple Butter: I realize that Apple Butter has been covered in past blogs, but after Mary Lynn and my experience this past week I thought I would go th...

Revisiting Apple Butter

I realize that Apple Butter has been covered in past blogs, but after Mary Lynn and my experience this past week I thought I would go thru the whole process with pictures to help describe what we are doing.
Mary Lynn busy cooking Apple Butter

Another reason for doing Apple Butter again is a talk we had at a dinner with some cousins. We got to talking about what is your "Comfort Food". To me comfort foods are one thing, and everybody else had a different comfort food. I come up with this description of comfort foods, it is something you eat that takes you back to a good time in your memory when you enjoyed the food and the company. So just about any kind of food could be classified "Comfort Food". So I am going to nominate apple butter made from fresh apples as a real honest to goodness Comfort Food. I will bet that there are many of you that will agree with me. Maybe a time with your mother or grandmother as you were growing up. There is not many things that can bring memories back like the smell of apple butter cooking. Not even the taste brings back more that the smell. So it is time to treat yourself to a trip thru your memories. Here is a photo of Mary Lynn cooking apple butter, maybe our grandkids will remember and cook like this in the future.

Well now that I got that little job out of the way lets get busy with the real reason for my blog, making apple butter from "scratch". I have almost got to the point were I think everything is made from that ingredient, scratch. So here is the scratch apple butter blog.

We started our quest to get real apples from real farmers by driving out to the State Farmer's market in Forrest Park, Georgia to get some real Georgia Apples. (Check your phone book or call your state department of agriculture if you don't know of a Farmer's Market in your area).

Boy did we luck out!!!! Our state market has rows setup for Georgia growers to sell their fruits & produce. Other rows are for people who buy wholesale fruits & produce for resale. We found these three types of apples at the first farmers stall we stopped at:
Rome Apples              Granny Smith Apples    
  Arkansas Black Apples   

He had other varieties, but we wanted to purchase bushels and 1/2 bushels, we save money that way. Smaller quantities cost more than larger amounts. Buying in larger quantities means you have to dedicate yourself to preparing the fruit within 3 or 4 days unless you have a really big fridge (or an extra fridge in your garage) to store the fruit. If you put off working with what you have bought, you will get spoilage. This drives up the cost, because you are throwing away your fruit to goes bad.

First job: washing each apple and drying them. This is needed because fresh fruit from local growers may have been sprayed with something or picked up something else that you don't want in your apple butter.

Next comes slicing and coring the apples. Mary Lynn fixed up a cutting board in front of the TV so I wouldn't miss football.Mary Lynn made for me I could sit and work with no problems.  She used a large plastic container and a cutting board.

This was necessary because I can't stand and work in the kitchen due to a problem with my spine and legs that won't allow me to stand for more than 4 or 5 minutes without problems.  So with the setup Mary Lynn then cooked the slices in fresh apple cider (also local) and 1/4 water. She put the cores in a mesh bag and cooked them with the slices. A lot of pectin is in the core and seeds. We also leave the peel on the apple slices for added flavor, color and pectin. this way when we make apple jelly from the juice we process later it sets up really well. We cook only one type of apple in a pot, this way the juice resembles the apple (Arkansas Black apples have a really dark red color and the juice has a red color. Really pretty jelly is made from the juices and the jellies all have a different look to them. Granny Smith has a greenish color, the Arkansas Black has a reddish color, etc...

The slices we cooked for about 1 1/2 hours. You want the peel to be really soft so it will go thru the food ricer/press or food mill easily. Allow the apples to cool and then pour or dip off the juice. Put the apples thru a food press or mill to make it to apple sauce. We still us an antique food mill we have had over 20 years. It works fine.

Food Mill
You can purchase one at a store that carries kitchen supplies. again, check your phone book or the internet for a store near you.

The apple sauce is now put into quart jars and processed for 30 minutes in a boiling water bath with water at least 2 inches over the top. Do not start the timer til the water comes back to a boil.
The juice we removed from the cooking pot is strained one more time thru muslin to get extra pulp out.  You will then need to put into quart jars and do the processing just like the apple sauce. You can also save some of the juice to drink. It is awesome!!!!

Putting the pulp and juice in jars and processing them will let you decided when and how much apple butter or apple jelly you want to make.  The processed jars keep really well in a cool, dark place.

After the cooking of all our varieties we are now ready to make apple butter. You have put in a lot of work so far, so we make our first batch a few days after the slicing, cooking and processing of the apples. If you have used more than one type of apple, check out the jars. They have a different color and juice content. Don't plan a particular variety of apples from your supply and knowing it by its color. Use a felt tip marker and write the name on the top of the jar before you water bath the jars. You might think you will remember, but you won't.
When we cook, we mix pulp from all the different apple types to give us a better flavor. Apple Butter from one flavor is good, but if you mix at least 3 varieties together, the flavor is better. This is how we come up with the name Georgia Apple Butter, it is made from varieties from our state, bought in our state from the farmers that grow them. We don't always use the same three varieties, and even if we did, some years the Granny Smith apples come from a different farm, some times they are a little more sweeter some times more tart. It all depends on the weather and the farm and even the farmer. It still is Georgia Apple Butter, just different Georgia apples. Something we noticed, apple butter made from sweet apples turns a darker color than apple butte made from les sweet. This is because the sugar caramelizes, not just the added sugar, the sugar from the apples also.
Any time you make something from scratch it is not going to taste exactly like the last time or next time. So many things going into the variable. The weather, the temperature, the pots you use, the stove or cooking pots you use. All these things have a reason in the taste.
We have noticed a slight difference with certain crock pots from others. Some may cook just a degree or two hotter or cooler than the other. So remember when you cook, all things change just a little, so don't add more changes than necessary.
This is the recipe for apple butter using real pulp in place of apple sauce. I gave you both recipes in earlier blogs, but I am going to give you the pulp one again.
12 cups apple pulp, 9 cups cane sugar, 1/3 cup cider vinegar, 3 tablespoons ground cinnamon, 1 1/2 teaspoons ground allspice, 3/4 teaspoon ground cloves.
Mix together in cook in a crock pot 8 to 10 hours. Stir the butter often to prevent sticking. After about 6 hours check the thickness of your butter. If it is still to runny, remove the crock pot lid and let cook a couple of more hours. Make sure you put a screen or mesh tent or food umbrella over your pots to keep unwanted things from landing in you apple butter. We bought food umbrella's at a local store called Dollar Tree. Check you area for a store like this.

When you are putting in the spices, if you don't like so much cinnamon, don't use it. If you use less use more allspice. At a family reunion recently I was asked by one of my favorite cousins if they could leave out cinnamon all together. Any time you leave something out of a recipe it is going to change the taste, so think long and hard about what you change or leave out. If you drop something, something else is going to have to take over in the taste.

In one of the photos you can see Mary Lynn using something to remove the air bubbles from the pulp before putting on the domes and rings and processing.
We one batch she forgot to do this and when she set the hot jars from the boiling water bath on the counter..... Holy Toledo!!!! What a mess!!!!!!!!!!!! The apple pulp started coming out of every jar. Now she will have to remove the rings and domes, wash the rings, replace the domes with new ones. You cannot reuse a dome once it is processed. Rings can be reused, but be carefull using older ones they may have some rust. Don't use any ring with rust!! Mary Lynn was so very angry with herself for forgetting to use something to get out the air pockets. Most home-made products need to be "de-bubbled".

As you can see, there is plenty of work in making apple butter from real apples and not store-bought apple sauce.

Here is an idea how much pulp we got from our apple purchase;

Arkansas Black Apples (medium to small apples) 1/2 bushel (about 70-75 apples) produced 8 quarts pulp.

 Rome Apples (medium+) 1/2 bushel (about 50 apples) produced 7 quarts pulp.
        
Granny Smith Apples (mixed, small to large) 1 bushel (80-85 apples) produced 14 quarts pulp. We always use Granny Smith no matter what other varieties w use. They seems to really give the Georgia Apple Butter its best taste. We tried not using GS in a batch and the taste was very different. So we have never left it out again. as a way of fact, the batch we made with out was added back and recooked with the Granny Smith.


In response to so many requests, Mary Lynn and I are starting back with our production  and sales of a limited number of our most popular items. In other words, "We Are Putting the Jam Back Together". We are selling thru a website that is working as you read this. now. The name of the web site is www.austinhouse.biz . Check us out, look around try something.

This will give you the chance to compare our products with the things you are making at home. Keep watching and reading, and now tasting is added to the menu.

Please subscribe to my blogs. I enjoy getting ideas for future blogs from you. Also be sure and check out my other blogs, you might have missed one. If you have an idea or a suggestion, contact me at jellymanga@gmail.com .


Don’t keep my blogs a secret. Pass the word on to your friends, neighbors and family members. They just might make something and share with you.  
Don’t forget, if someone asks you if you can can it. Say Yes I Can Can It!

Friday, June 22, 2012

Relish the Idea of Relish Again.

After I finished my blog on relish, "I relish the time making Relish" I look back and I saw that I had not even covered half of my favorite relishes. Earlier I talked about Pepper Relishes, both Sweet and Hot. I think it is now time to cover some fruit relishes. And maybe a couple that are not fruit. 

While you are at the top of the page, PLEASE do my question box on the right. It is just for fun, I will let you know the results in a upcoming blog.

Now on to relishes!

 How about starting off with Pear Relish. I am not sure what parts of the country have the "Old Fashioned" hard Pears, but here in Georgia it is a fruit used for many purposes. The most famous use of the hard pear is Pear Preserves. I will cover that in a soon to be blog about Grandmothers and their Preserves. What I am going to use the hard pear for is relish.

Hard Pears


 Hard Pears are called that because well, they are hard. Seems to easy,  but they are rock hard and if you get hit by one either by accident or someone throws one at you. You will know what I mean when I say hard. The peel is usually a dirty brown color. The pears you see in the grocery, the Bartlett probably being the most popular, are generally soft pears. They are very, very juicy and easy you eat. Hard pears are much harder than a Granny Smith Apple. I have heard of people who have lost teeth trying to eat a hard pear. Well enough talking and photos, on to Pear Relish.


To make Pear Relish start with 14 cups pears, peeled, cored and chopped small, 3 cups green bell peppers and 3 cups red bell peppers seeded, and chopped small, 4 cups sugar, 1 tablespoon pickling spice, 1 tablespoon salt (Kosher, Sea or canning), 5 cups cider vinegar, 1 tablespoon turmeric. Combine all ingredients in large cooking pot. Heat to a boil while mixing very well. Cook for 30 minutes. Hot Pack into prepared 8 ounce canning jars to within 1/4 inch of jar top. Prepared canning jars are jars that have been washed and dried. Hot Pack means to load the jars with hot product. The domes and rings that come with the jars need prep also. The domes should be placed in boiling water before putting on jars. Rings need to be rinsed off. Before putting on domes, clean the rims of the jar with a damp paper towel. Do not over tighten the rings or tighten just a little. If you over tighten air will not be able to escape, under and water leaks in. So "Finger Tighten". Process in a boiling water bath with at least two inches of water over the tops of the jars for 20 minutes. Let set undisturbed over night. In the morning check for unsealed jars, they have to be reprocessed with new domes. let set in a cool dry place for at least a week to cure.

To make Hot Pear Relish just substitute 1 cup green Jalapeno' Peppers and 1 cup red Jalapeno' Peppers and just use 2 cups each red & green bell peppers. If you want more heat make it 2 cups each Jalapeno' and 1 cup each bell peppers. I have never made it with just Jalapeno or anything hotter. Pear Relish is supposed to be a sweet relish. There are plenty of burn-you-out relishes out there. I love Hot Pear Relish on Brats from the grill, that and brown mustard. A beer would not be bad, but iced tea will also do, whatever is your pleasure. Also on burgers with sliced tomato. I have to stop this, I am getting hungry.
Next is a major favorite. This is our most used relish in our house. Mary Lynn makes all sorts of things with this relish. my favorite is tartar sauce for fish. She uses this in place of sweet pickle relish.

The relish I am talking about is Green Tomato Relish.

You start with 4 quarts peeled, cored and chopped green tomatoes, 2 quarts chopped cabbage, 2 cups chopped green bell peppers, 1 finely chopped onion, 1 1/2 cups brown sugar, 1/2 cup Kosher or canning salt, 2 tablespoons mustard seeds, 1 tablespoon celery seeds, 1 tablespoon prepared horseradish, 4 1/2 cups cider vinegar. Sprinkle salt over vegetables and mix thoroughly; let stand covered 3 to 4 hours. Drain the liquid thoroughly, press to make sure all liquid is out. Add sugar, spices and horseradish to vinegar, simmer for 15 minutes. Add vegetables and bring to a boil. Remove from heat and hot pack into prepared 8 ounce canning jars. Place domes and rings. Process in boiling water bath for 15 minutes. Remove from heat and let set overnight. In the morning check for unsealed jars. Let cure for about 1 week, but longer is better. Two weeks should be long enough.
Hot Green Tomato Relish use half Jalapeno and bell. You could just use all Jalapeno. Again this is not a "Hot" relish.

Next will be  Red Tomato Relish. This relish is completely different from green tomato relish, not just because it is red.....duh! It is different in the way you use it. Growing up my grandmother would make this (minus the bell peppers, they didn't agree with her) and heat it. We would eat it on all sorts of things light cooked cabbage or dried beans, or just all kinds of things that people down on farms ate. Come to think of it, my grandmother never had ketchup on the table, we used this relish in its place. Well let's not make me go down memory lane, let get cooking.
 
Red Tomato Relish starts with 12 cups large ripe tomatoes that need to be chopped large, 3 cups fine chopped celery, 8 cups finely chopped sweet onions (Vidalia's are the best), 6 tablespoons kosher or canning salt, 4 cups small chopped bell peppers (optional if they don't agree with you) 1 1/2 cups sugar. In a large cooking pot combine everything except the sugar, bring to a boil and simmer 2 hours. Add sugar, boil for 2 minutes.Hot pack into prepared 8 ounce canning jars. Process 30 minutes in a boiling water bath. If you have a pressure cooker, process jars 10 minutes in a pressure cooker. If you use the pressure cooker let cool completely before removing jars. Don't try to speed up the process, this will only lead to disaster.

Hot Red Tomato Relish is made the same way, just substitute Jalapeno' peppers for bell. Try this relish is you don't try anything else. it is just fantastic.
I think I like our products a little too much. Well I wouldn't have made them if I didn't like them. That is something that surprised people at every show we did. They would ask for something we did not make. I would say that I did not like that, so we didn't make it. They would always say that people would buy things even if I didn't like them. I would always come back with "I don't make it because I don't like it. If you ask me how was XYZ I would have to tell you I didn't like it" Now haw many people would buy it then. I never lied to my customers. If they ask about something, I would tell them about it and how i used it and how my families have used it in the past. I also told them that if they didn't like what they bought to bring it back and I would trade for something else or refund their money. In all the years we did our business I never gave a refund or traded. So I guess that means being honest with your customers is the best way. They could also look at me and tell I had eaten plenty of something.
Something else I would tell people, Never buy food from a skinny chef. Two possibilities; #1. They did not eat their products, and #2 they did. I always said that number 2 was the worst answer if they didn't get it. IF you don't get it, they were skinny because they made BAD food. Well enough of my story, on to the last recipe, just about everybody's favorite no matter where you grew up.

Our next project is Corn Relish.  

We use 3 pounds thawed corn from the grocery (usually 2 large packages), 3 cups chopped finely red & green bell peppers, 1 teaspoon chopped parsley, 7 cups chopped onions (milder variety), 2 cups brown sugar, 2 cups corn syrup, 2 tablespoons kosher or canning salt, 7 cups cider vinegar, 1 cup water, 1/2 teaspoon turmeric, 1 tablespoon mustard seeds, 1 tablespoon celery seeds, 1/2 cup chopped celery, 1 tablespoon citric acid. Mix all ingredients completely in a large cooking pot, bring to boil. Cook covered for 15 minutes. Hot pack into 8 ounce prepared canning jars. Process 15 minutes in a boiling water bath. Let set for 1 week, relish should be ready to enjoy

Sweet Pickle Relish,    1 quart chopped cucumbers (towards the small size), 2 finely chopped sweet onions, 1 cup chopped green  and 1 cup red bell peppers, 1 tablespoon Kosher or canning salt, 3 1/2 cups sugar, 2 cups cider vinegar, 1 tablespoons celery seeds, 1 tablespoon mustard seeds. Combine cucumbers, onions and peppers in large bowl; sprinkle with salt and cover in cold water. Let stand 2 hours then drain, press to make sure all liquid is out. Combine sugar, vinegar and spices in large pot, bring to boil. While boiling add vegetables and simmer for 10 minutes. Hot Pack in 8 ounce canning jars. Process 15 minutes in boiling water bath. Let sit for 1 week before opening.

If you want Hot Pickle Relish just add some Jalapeno' Pepper with the seeds left in. Put raw slices on the bottom of you pickles uncooked. While the pickle are sitting for at least a week, go over and mix the jars unopened.Just shake them around a little bit so the flavor of the peppers will go all threw the jar. You will be surprised how much the pickles will change. From a sweet pickle taste to a sweet hot taste.

When you are measuring spices to use, be careful. To much can change the taste. To much celery seed will bland down whatever you are cooking so much that you might as well throw it away and start over.
I still have a few relishes that I wanted to cover. But I guess my talking got away from me again. Seems like that happens all the time. We all enjoy talking about things we love and canning and the jelly business was something I loved more than just about everything (people not included). When we did shows I would talk so much that we would have a crowd around the front of our booth. People saw the crowd and wondered what was gong on. They stopped and before they realized, they were part of my crowd. I had favorite jokes and stories to tell all the time. Our good friend Mark Thomas, wild life photographer, had a booth next to us at the Yellow Daisy Festival in Stone Mountain, Ga. After the first year he said that he could almost tell my stories and jokes by heart. He said that some of them never change and some just get better. That was just about the nicest thing he could have said.

It is that time again. You know that part about sending me suggestions for future blogs and stuff like that. Well here goes....

Please let me know what you would like to make or any ideas you have for the next blog. Just drop me a note at jellymanga@gmail.com

Also don't forget that our web page is up and running! It is www.austinhouse.biz Don't be shy, order something and try it. Make something and order ours and compare. Send a gift to anyone! The ideas and ways to use our site is limitless! Don't be the last to try us, what we don't have is operators standing by, but we do have a website standing by......

Don’t keep my blogs a secret, and pass the word on to your friends, neighbors and family members. They just might make something and share with you.

Don’t forget, if someone asks you can you can it. 

Say Yes I Can, Can It!

Tuesday, March 27, 2012

I Relish the Time Making Relish

One of my favorite uses of relish
Before we start, I want to say that relish is one of my very favorite groups of products.

The way people use relishes vary from coast to coast. Some use relish as a condiment: some use it as an ingredient for making something else. A couple of my favorite ways to use various relishes is as a topping for burgers and hot dogs. I also like the way Mary Lynn makes homemade tartar sauce for fish using relish. My outer family (the ones that don’t live in my house) use some as a topping for meats and vegetables at the dinner table. So you see just in my family group, we have many different ways of using a relish. Even in the title I used relish to describe my joy in making relish. The blog that I did early in my blog career about Pepper Relish is the most popular by far of all the blogs I have written. If you have missed it here is a link to go back to it http://canucanit.wordpress.com/wp-admin/post.php?post=234&action=edit. If you use this link, you have to promise to return and try some of the new relishes listed below.

I think that more relish is made in the late summer and early fall. I think that is because more summer veggies have their final harvest and some of the fall plants are starting to show early rewards. Well, enough of my going on, let’s get busy making some relish! I will give you the recipe and let you make your own shopping list. Also these recipes make a large amount. If you cut the size be sure and cut everything the same way. If you don’t I am not sure what the end results will be. When Mary Lynn was reading this, she burst out laughing because she has done that. All Relishes after processing need to sit at least a week to taste best. They should be kept in a dry area away from direct sunlight.

A huge seller in our business was Black Bean Relish. It uses a fair amount of time and ingredients, but well worth the effort. A hint about this relish, it is one that is better the longer you let it set, allow at least a month. You can enjoy the taste when you are making it, but that is nothing like the taste after a month has passed.

Black Bean Relish
5 cups cooked and rinsed black beans (you can use canned beans, but fresh cooked is best by far), 4 cups frozen cut or niblets corn, 3 cups chopped small red & green bell peppers, 1 cup chopped small sweet banana peppers, 4 cups white vinegar, 3/4 cup sugar, 1 cup chopped celery, 1 cup water, 3 tablespoons mustard seeds, 1/2 teaspoon celery seeds, 1/2 teaspoon turmeric, 1 1/2 cups finely chopped onions, 1 teaspoon dried mustard, 1/8 teaspoon ground allspice, 1 tablespoon salt (Kosher, Sea or Canning).Combine all ingredients in a large cooking pot. Mix completely. Bring to a boil, then turn the heat off. Put into canning jars that have been washed and dried. Leave 1/2 inch space at the top of the jar, this is very important becuase the beans expand. Using a damp paper towel, clean the rims of the jars. Place sterile domes (boiled in water) and rings on jars. Finger tighten the rings (also very important. Too loose and water will leak in, too tight and air will not escape from the jars and they will not seal). Process in a boiling water bath (with at least 2 inches of water above the top of the jars) 20 minutes, start time after the water comes back to a boil. Make sure that the jars do not touch the bottom of the water bath, they will burst. Use a rack, preferably a canning pot to boil with. Carefully remove the jars and let sit over night to completely seal. In the morning check for jars that have not sealed. They have to have new domes and be reprocessed.

Canning Pot with Jar Rack

This is a canning pot. Notice the rack for setting jars
into a boiling bath and for safely removing them.
Cost is $20.00 or less in some places. It is worth the
cost if you are going to do more than one project.
With the dangers of jars busting, it is almost worth
it for one project. The right equipment really does make a difference!


Looks like a big job. After you have made a relish or two, it will not look so bad. Don’t be afraid to tackle it. The taste rewards are worth the effort. making relish is not as bad as making some jellies. At least you can buy what you need from the grocers. You don’t have to climb a tree to get what you need.

Next up Chow Chow. I did not studder, the name really is Chow Chow. How it got this name and what it means, I haven’t a clue. I have asked many people who I thought might be able to help me, they all said that was the name they have always known. According to Wikipedia, it is a Nova Scotian and American pickle relish made from a combination of vegetables. They still don’t say why the name. They do say that the word chow refers to a French word Chou which means cabbage. They also say that is refers to a Chinese word and a reference to an Indianan word chayote. That is India not American Indian, but maybe both. Like I said no single thing can describe the name of the next relish.

Chow Chow. 10 quarts chopped green tomatoes, 5 quarts finely chopped cabbage, 8 cups chopped onions, 8 cups chopped green bell pepper, 4 cups chopped red bell pepper, 1 gallon white vinegar, 8 cups sugar, 4 tablespoons pickling spice (we used 1/2 Sauer’s and 1/2 Kroger Brand), 1 teaspoon celery seeds or more to taste, 1 teaspoon mustard seed, 1 1/2 teaspoons turmeric.
Chow Chow
Combine cabbage, tomatoes, onion and peppers in a large non-metal container. Cover with 1 quart water and 1/2 cup salt (Kosher, Sea or Canning). Cover mixture and refrigerate over night. Next day, drain and rinse a couple of times, draining very well the last time. Mix vinegar, sugar, celery seed, ground mustard and turmeric. Bring the mixture to a boil and simmer for 15 minutes. Carefully add your drained vegetables and bring back to a boil, mixing as well as possible. Simmer for 5 minutes. Remove from heat and hot pack 8 ounce canning jars. Use the same precautions and instructions as above. Process the jars in a boiling water bath for 15 minutes. Remove and let sit over night. Check for unsealed jars that need reprocessing.
I was told that the Pennsylvania Dutch make this, but they use purple cabbage and purple onions. Adds color, but tastes just about the same. Don’t know what they call it, maybe Purple Cabbage Chow Chow. The person that relayed the info was just passing on something she had seen at a craft show in Pennsylvania. If anybody has that info, don’t be shy, send it to me in an e-mail. I promise I won’t use your name if you don’t want me to. Seems like Chow Chow in one form or another could almost be called “The All-American Relish”. It has been made in one form or another all over the USA and probably the world.

Wow, all this and only two recipes. Well it looks like I am going to have to do a couple of more blogs on relish to give you just some of our recipes for the favorites. I am not going to do them back to back, I will post them every few blogs Don’t want my jelly people to forget me. Next on the menu is Garlic Relish. Now don’t tune out when you hear the word Garlic. This is a great relish to make dip with for parties. Great rub for roasted chicken. I love it on Brats from the grill. But that is just me. I am a Garlic lover, you can never have too much garlic. Something most don’t realize is that when garlic is pickled, it developes a sweet taste. Not like jelly sweet, but a milder taste that taste sweet. It is hard to describe, so you are just going to have to trust me on this one. Well without any more delay:

Garlic Relsih
Garlic Relish - 1/2 cup white vinegar, 1/2 cup sugar, 1/2 cup minced garlic, 1/3 cup finely chopped red & green bell peppers, 1/3 cup finely chopped cubanelle peppers (a medium/mild heat pepper), 1/3 cup finely chopped red onion, 1/3 finely chopped yellow bell peppers, 1/2 teaspoon dried pepper flakes, 1/4 teaspoon salt (Kosher, Sea or Canning).

Bring vinegar and sugar to boil. Add garlic and simmer 25-30 minutes. Add peppers, onion and remaining ingredients and spices. Simmer 15 minutes, stirring completely during this time. Same directions for jarring relish. Process 15 minutes in water bath.

For Hot Garlic Relish add one heaping tablespoon Red Pepper Flakes and 3 tablespoons diced Jalapeno’ Peppers.

To close out this blog I am going to give you a recipe that we made up using whatever we had on hand at the time. It was an experiment that worked out better than we could have ever hoped. So good that we made it all the year-long from that point. Looking for a name to go with this, we came up with Christmas Relish. How original can we be. If you only try one relish on this entire page, please try this one. I think it will become your families favorite.

Christmas Relish6 cups chopped red bell peppers, 6 cups chopped green bell peppers, 6 cups chopped Granny Smith apples, 6 cups chopped Rome apples, 2 cups cider vinegar, 3 tablespoons salt (Kosher, Sea or Caning), 3 tablespoons mustard seeds, 2 cups chopped Vidalia (or any Sweet) Onions, 2 cups chopped purple onions.
Christmas Relish
See how pretty all the Red and Green looks.
Combine all ingredients in large pot, heat gently, while mixing completely, simmer for 15 minutes. Using instructions above jar relish. Process in boiling water bath for 15 minutes.
If you did not notice, all the ingredients were sort of Christmas colors. It is a bright and sweet tasting relish to go with almost anything you would use relish or sweet pickle relish for. It is great on just about anything we tried. It seemed that we reached for this relish every time till the jar was empty.
I think this is about as many recipes as I can get in a single blog. If you pay attention to what the people who make the rules say all blogs should be under 1000 words. So far the closest has been around 1300. Just like every thing else in the world. I don’t listen to the rules makers. I just make my own as I go along. Not that I confuse myself with the people who explored and settled our country. But they didn’t listen to rules either. The world was not flat, you get to India by sailing West from Spain. They didn’t listen and I don’t either. I am not sure how good they were at making jellies or relish, but I am not good at discovering new countries.

On this note, I close in my usual way. I ask for you to pass on my blog to friends and neighbors and to subscribe at the bottom of the page. Looks like you are coming back to read, but no body subscribes. That is the way the rules makers come up with how successful a blog is. If you look down you will see 1 person has subscribed. That makes me a not very successful writer. I will keep on writing even if you don’t click. But it would be more fun if you did.

Also don't forget…. Mary Lynn and I are going to start selling some of our most requested items from a website. The site www.austinhouse.biz is not ready yet. I will let you know when we are up. If you like you can purchase something from us and compare it to what you have made. See how things match up against us.

Please let me know what you would like to make or any ideas you have for the next blog. Just drop me a note at jellymanga@gmail.com

Don’t keep my blogs a secret, and pass the word on to your friends, neighbors and family members. They just might make something and share with you.

Don’t forget, if someone asks you can you can it.

Say Yes I Can, Can It!